Showing posts with label my home. Show all posts

Wednesday, March 28, 2012

China Cabinet Turned Office

Would you believe me if I told you we haven't had internet access at home for the past almost 3 years? It's true. I have access to the internet at work, so I never felt the need to have it at home too. But that has now changed. We left our caveman ways behind us, and we are now online at home. Yeah! So I thought this would be a great time to give our computer desk a little face lift.


This is actually not a computer desk at all; it's a china cabinet!


See? We haven't actually used it as a china cabinet for awhile now, and it doubles quite nicely as a home office space. I just had to adjust the shelves a bit, drill a hole in the counter top for cords and wires to drop down, and voila - china cabinet no more. Add a few baskets for storage, a bulletin board, a computer, and it's now a fully functioning office.


The space underneath is great for storing not-so-pretty things, like drawers, bulky things, and a printer.


Just because a piece of furniture is designed for a specific use, doesn't mean you can't use it for something else!

Tuesday, February 21, 2012

Frames


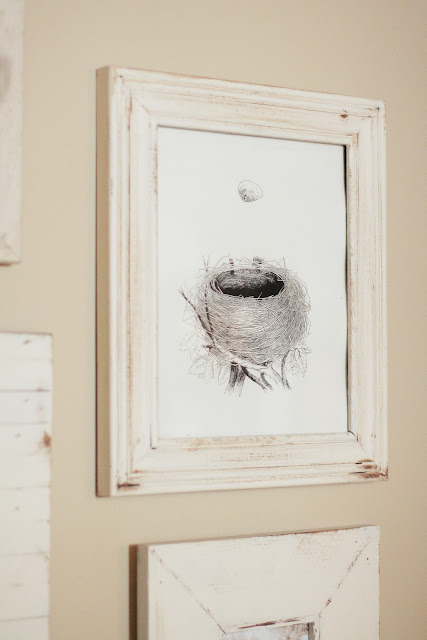
I've had a box of picture frames sitting in our laundry room for the past year, and just last week I finally decided it was time they go up somewhere. Funny how the little tasks that take hardly any effort are the ones that always take the longest to get finished. I hung these on an empty wall in our bedroom. It only took about 10 minutes... well, one year and 10 minutes.


I used some of the leftover chalkboard paint I had from this project and made one of the picture frames into a small chalkboard. Chalkboard paint can be used on glass, so this could be done easily with any picture frame.


Instead of using photos in all of the frames, I printed off some graphics from The Graphics Fairy. They have hundreds (maybe thousands?) of vintage art graphics that you can print for free right at home. It's really great!

Now if you'll excuse me, there's some Girl Scout thin mint cookies calling my name. Yes, cookies before 10 a.m. Don't judge.

Monday, February 13, 2012

DIY: Oversized Chalkboard


This chalkboard is something I've been wanting to make for a while now, and after seeing this picture on Pinterest, it gave me the motivation I needed to get it done. It was very easy and I love it! Here's how I did it:


I started with a 2' by 4' piece of prefinished plywood. My dad, who builds cabinetry for a living, let me have this piece from his shop and cut it to size for me. If you don't have a handyman in the family like I do, you can have this done at Home Depot or Lowe's.


After sanding my piece of wood, I rolled on three coats of Rust-Oleum's chalkboard paint. I let it dry four hours between coats, and gave the paint three days to cure before writing on the surface.


During those three days (which seemed to drag on forever) Jesse added a wood frame to my chalkboard. He found some scrap wood from my dad's shop that was already stained, cut four thin pieces, and attached them directly to the sides of the plywood with some wood glue and a micro pinner gun. I then added a couple heavy duty picture hangers to the back. I found them at JoAnn Fabrics and they look something like this:


Finally, the chalkboard was ready to use!


First, I had to "season" the chalkboard by rubbing the side of a piece of chalk all over the surface and erasing it. This layer of chalk dust makes writing and erasing a little smoother.

And... done!!


Tuesday, February 7, 2012

An Organized Closet

Welcome to my closet!


It hasn't always looked like this. I used to share this closet with my husband and it was a wreck; everything was packed in so there tightly I practically needed the jaws of life to get dressed in the morning. So recently, we did some re-organizing. Jesse willingly moved all of his clothes to a separate, slightly smaller closet and gave me full custody of the big closet. What a guy! :)


Everything is sorted by color. I've found that it's so much easier to get dressed when my closet is organized like this. Locating a particular item is a breeze and it's easier to put together an outfit in my head when everything is clearly visible.


Boxes and baskets hold my socks, tights, bras and undies,


a linen pinboard for organizing my jewelry,


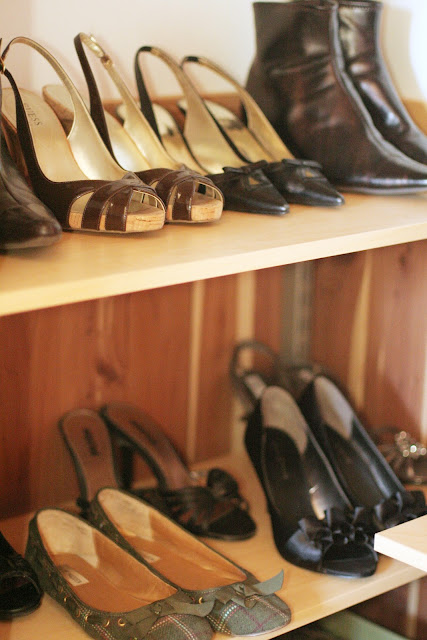
shelves for shoes,


a cheap tension curtain rod to hang scarves on,


and baskets for belts and sandals.

A neat and tidy closet truly does wonders for my morning routine. With less time spent getting dressed, I have more time for coffee and devotions. It's a win/win!

Thursday, February 2, 2012

House Numbers

On Tuesday, I shared a little preview of a DIY project I was working on. Well, here it is... painted house numbers!


I got the idea from Pinterest. I was planning on doing this in the spring, but when I heard we were having a 60 degree day in January, I quickly jumped on the opportunity. Here's how I did it:


On regular paper, I drew an outline of my letters and numbers and carefully cut them out with scissors. I didn't want to just start painting without any pattern, because if I made a mistake it would be a little difficult to fix. Once I had everything cut out, I arranged them where I wanted and taped them on the door.


I roughly traced everything with a pencil. Once that was done, it was time to paint! This took a very steady hand, which I totally didn't have. That extra cup of coffee I drank that morning really wasn't doing me any favors.


The paint I used is Olde Century acrylic paint in Manor House White. It's indoor/outdoor paint and a small bottle like this was only about 5 bucks. The brush I used was just a small arts and crafts paint brush.


This is what it looked like after one coat of paint. It needed one more, so I let it dry for about an hour before giving it another coat.


It was super easy, very inexpensive, and I love the results! It gives our otherwise plain-jane house a little personality. Now maybe I should start thinking about giving those stairs some fresh paint too...

Thursday, January 19, 2012

Catching Up


Let's see if anyone still reads this thing. I just checked to see when the last time I updated was... May. Whoops. Time sure does go fast lately! It's hard to believe it's mid-January already. But maybe that's because our temperatures have been in the upper 50s with hardly a trace of snow. Silly Ohio. Anyways, just a few pictures of what the house looks like these days.

Oh, and happy new year! I don't think it's too late for that, right?

Tuesday, May 17, 2011

Spring Lilacs

I know I haven't posted anything on here for a (long) while now, but I had to drop by and show you my oh-so-pretty lilacs! Our one and only lilac bush is in bloom right now and I've been taking full advantage of it. The smell is just amazing; I could hang out by the lilac bush and just whiff it in all day long. Sadly, they'll be gone in just a few short weeks... nature is mean.